

Having a collection of mismatched frames can be a bit overwhelming, but this technique of hanging photos makes it easy to make changes before you put unnecessary holes in your wall.
We bought our house over four years ago and still had a big blank space on the wall in our living room. When we moved we came with a box of framed pictures. For years those frames languished in their box in the basement of our “new” house.
We had lovingly wrapped our pictures from our old gallery wall in bubble wrap, but with two little kids, jobs, and working on the food production part of our homestead, the pictures just hadn’t been a priority.
When I see a cozy place in others houses, its because it feels like home, it feels lived in, you can feel the love the family has through the photos on their walls and the special items that they keep in their view on a daily basis.
This may or may not be our forever home, but I know that we are going to be here for awhile longer, that meant it was time to get the photos up onto our walls, to share our love when we have friends and family over and making sure that they feel the same coziness in our home that we feel when we sit down as a family, surrounded by memories made with those that we love.
Here is how to make a simple gallery wall with mismatched frames.
Not exactly homesteading… but definitely homemaking. They aren’t the new/in thing anymore, but I love how a gallery wall allows me to display an eclectic collection of frames and photo sizes.
There is nothing quite like completing a project that completely changes the feel of a room, but this is definitely a project that will give you a feeling of accomplishment.
What you need:
- The pictures and frames you want to hang
- A roll of wrapping paper – the extra wide thin kind from Christmas time is the best because it gives you the most space to work with
- Sharpie
- Level
- Hammer
- Picture hanging nails and/or hooks
- Masking tape
1. Collect all the pictures and frames you want to display and grab your roll of wrapping paper
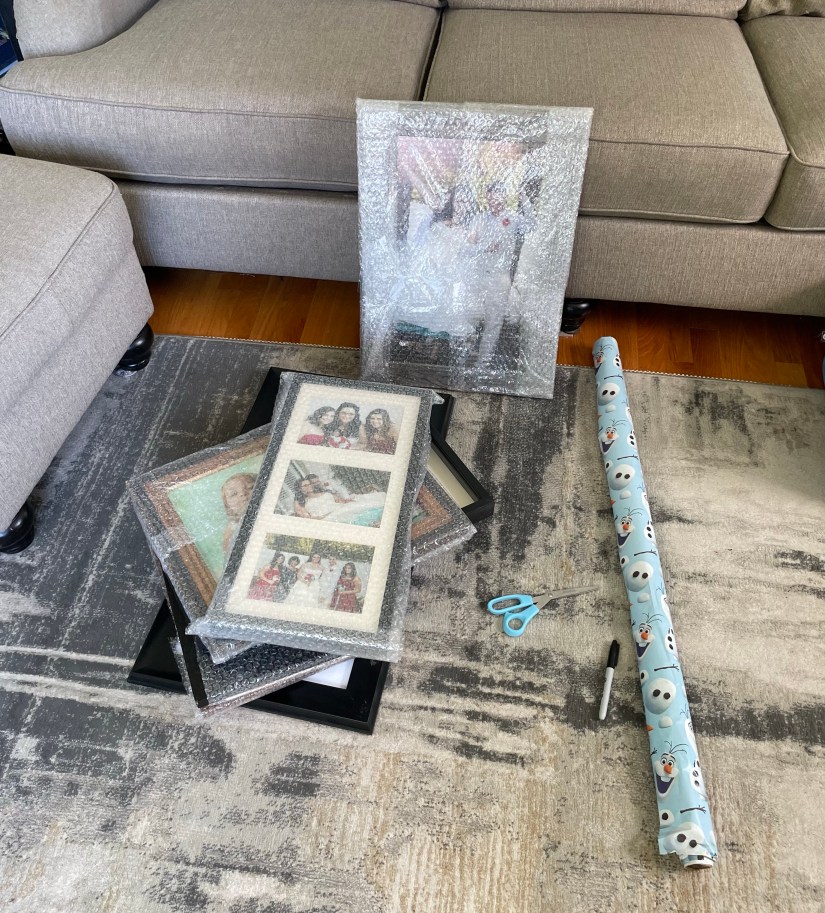
3. Grab a Sharpie, some scissors, and some masking or painters tape. While you’re at it- get the rest of the tools you need for hanging: nails/hooks, hammer, and a level (this is especially important if any of your frames have two points of contact with nails on the wall).
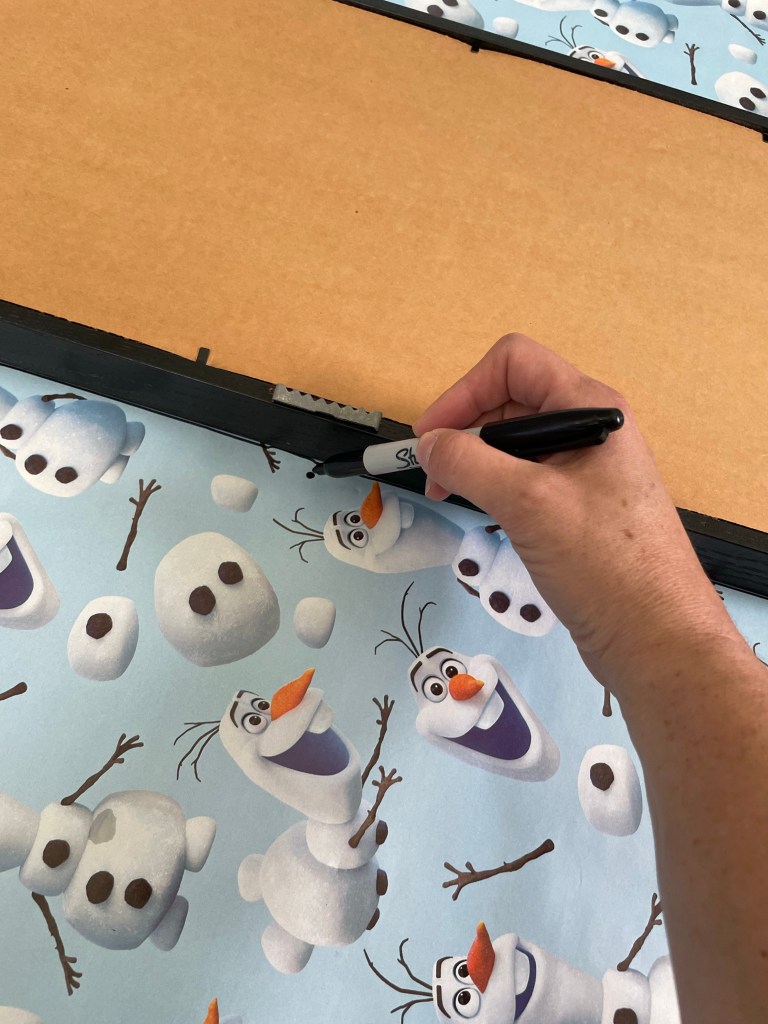
4. Start tracing all of your frames onto the wrapping paper. Cut them out as you go. Label the paper! I use descriptions and a number (use a small piece of masking tape on the back of the frame to do this). This makes it so that when you’re putting the paper up you really know what you’re putting next to each other. Also make sure to indicate which direction that piece of paper should be when it’s on the wall. I use up and down arrows.


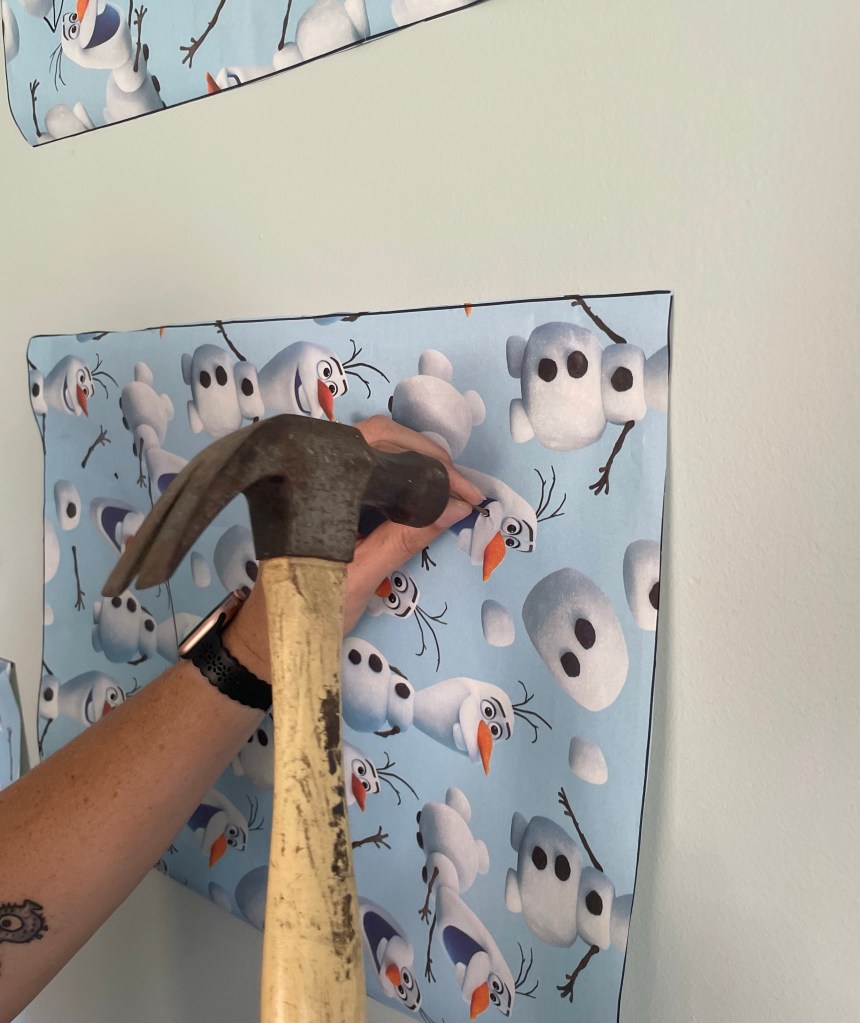
5. When you trace your frames you also want to make sure that you are marking where the nails go. For those tricky little triangle holders I press down on the wrapping paper to leave an imprint and then make a dot at the apex of the triangle. This is also where you want to make notes on your papers if a frame has a wire hanger that you need to use a hook for rather than just a nail.

6. Once you have all of your frames traced and cut out use masking/painter’s tape to arrange them on your wall.

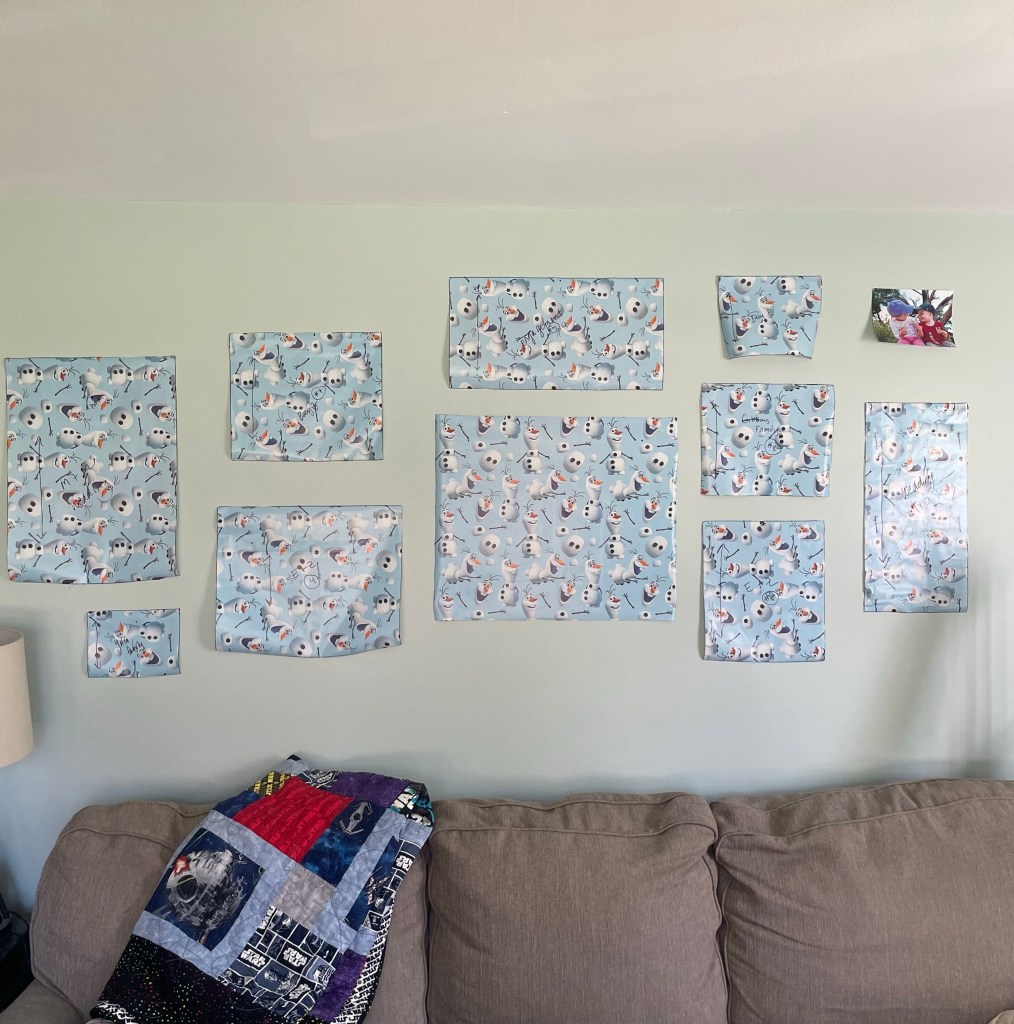
7. Once you have and arrangement you like you can start putting your nails in. Just hammer right through the wrapping paper. This is where you need to use your level, if your frame has two points of contact with the wall you must make sure that your wrapping paper placeholder is level before you start hammering nails.
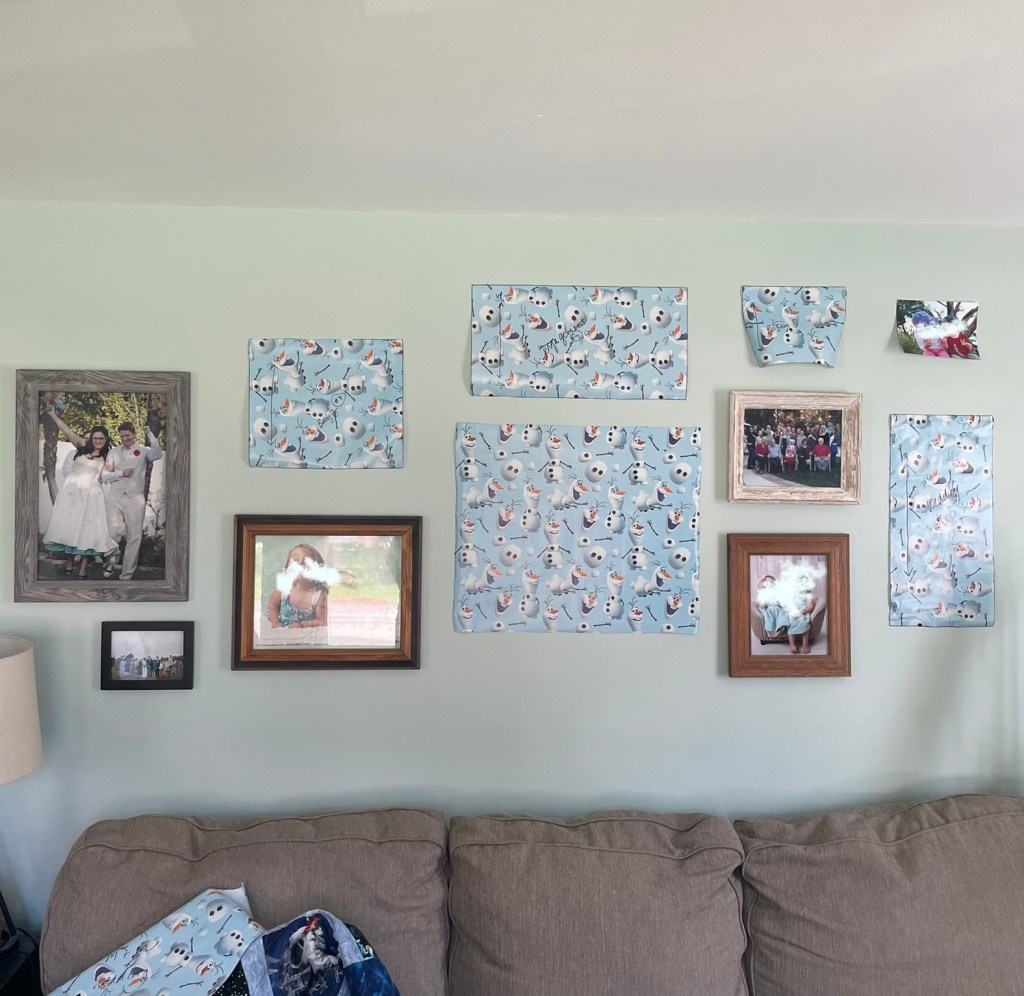
8. With all of your nails in, go one by one, ripping down the paper and putting up your frames.
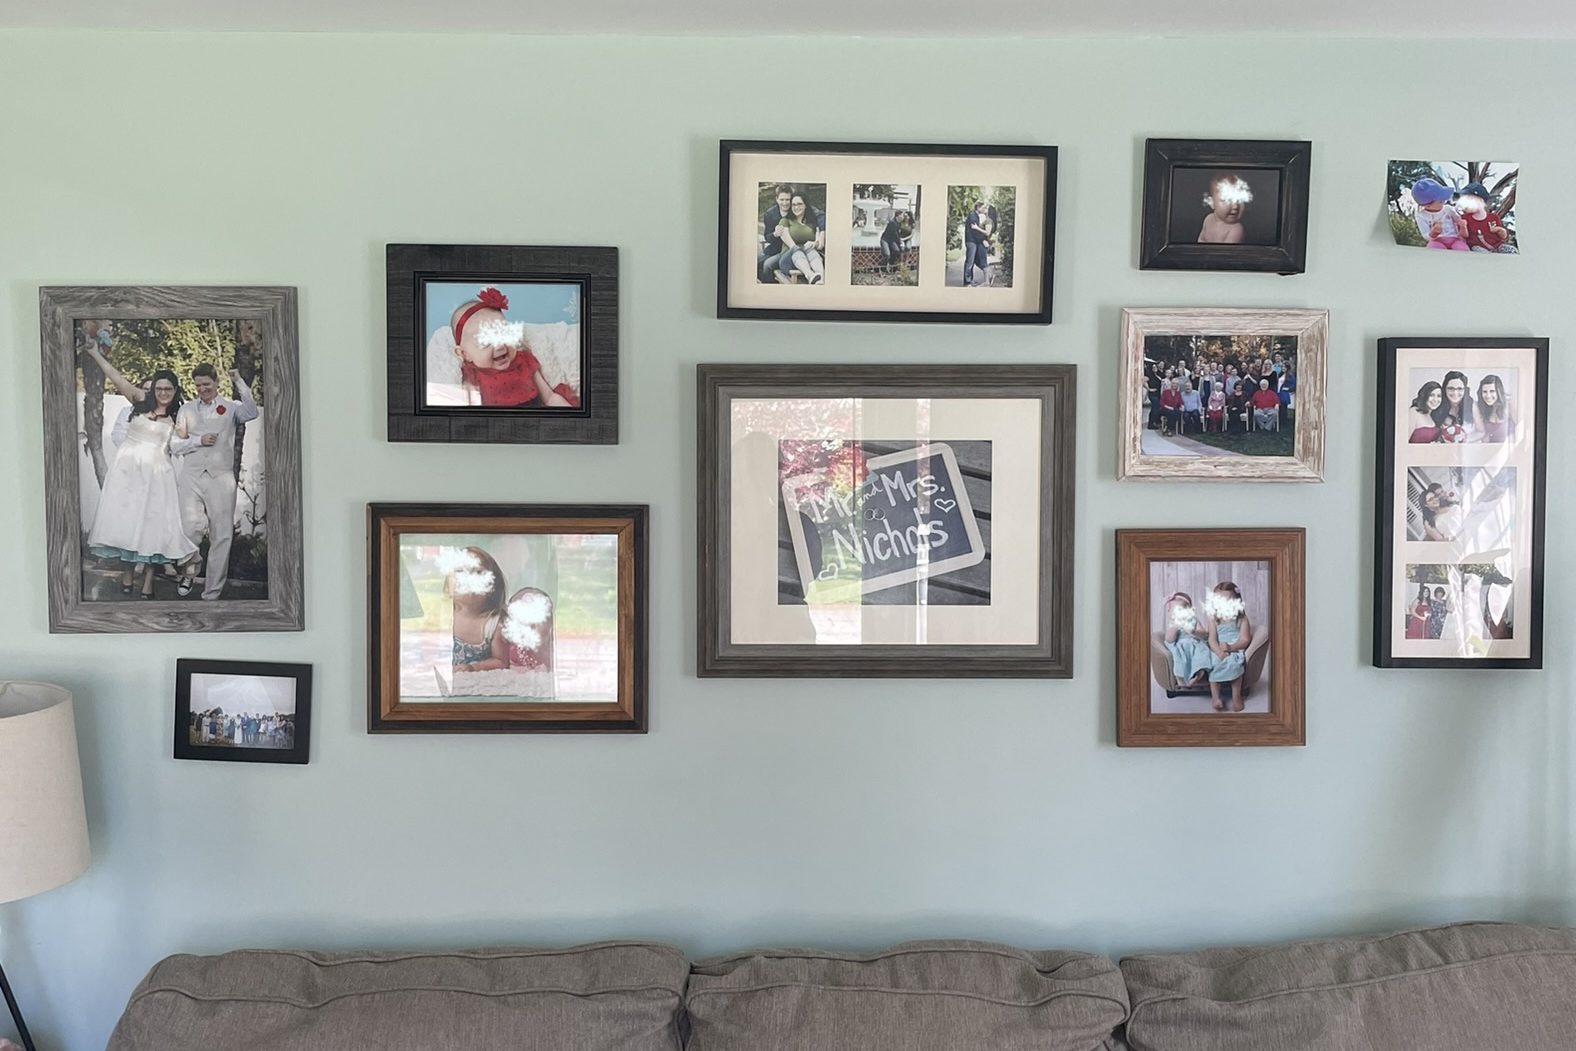
You did it! Now you have an awesome wall filled with your favorite photos.

The payoff on this project was huge. The smiles on our girl’s faces when they came home to see pictures of themselves and their family all over the wall was well worth the effort.
This article contains affiliate links and our personal homesteading experiences. We receive a small commission from items purchased through our links and we appreciate every bit of support in making our home a homestead.
