

We have been making our own veggie stock for a few years now. It was one of the first steps that we took in making our kitchen more “from scratch.” This is one of the easiest and cheapest things you can do towards making your home a homestead. Even if you don’t have homestead dreams it is a great way to get more nutrients into your staple side carb dishes.
There are some affiliate links or adds in this article. Clicking on these links does not cost you any extra money, but helps give us a small boost towards making our homestead dreams come to fruition. While we encourage shopping local we also realize that is not always possible. Please see our full affiliate disclosure here.
Collect your kitchen scraps
Keep a bag or airtight container in your freezer. When you cook meals at home there are many kitchen scraps that you can give a second life to (spoiler alert: they will get a third life in your compost). You can also freeze those veggies that you may have extra of and might be a bit past their prime for eating, but haven’t gone bad yet. In theory you can make your own veggie stock without buying anything extra. Our veggie stock tastes different throughout the year as the vegetables that we use more often change throughout the seasons.
Some of the best scraps for veggie stock:
- Onion tops and roots, including the papery skin – the more onions the better
- Scallions
- Carrot tops (even the green parts) and peelings
- Celery – (including the top leaves and bottom of the stock, just make sure you aren’t putting soil in your stock
- Garlic skins and whole cloves – We typically make sure to add a smashed whole clove or two to our batches
- Fresh or dried herbs, including the stems
- Tomatoes
- Corn cobs
- Mushrooms
Scraps to use with caution:
- Bell pepper scraps (though we often try to keep as much of the white membranes and seeds out of it as we can to prevent a more bitter tasting broth). Some say that the flavor of bell pepper can be overwhelming, but this has never been a problem for us and our stock always has plenty of bell peppers in it
- Sweet potato ends (make sure you have scrubbed them clean and aren’t adding soil to your stock) – this is another one that in my experience can cause bitterness, but we use most of our sweet potato so these additions are usually minimal
- Broccoli – the stocks are better to use than the leafy greens – but again can be overwhelming or bitter
- Really any vegetable can go into your stock, but just keep in mind that they will change the flavor of it.
How to make your stock
You can throw all of your veggies straight into a stock pot, add water and go, but to get the most flavor out of our broth we take a few extra steps.
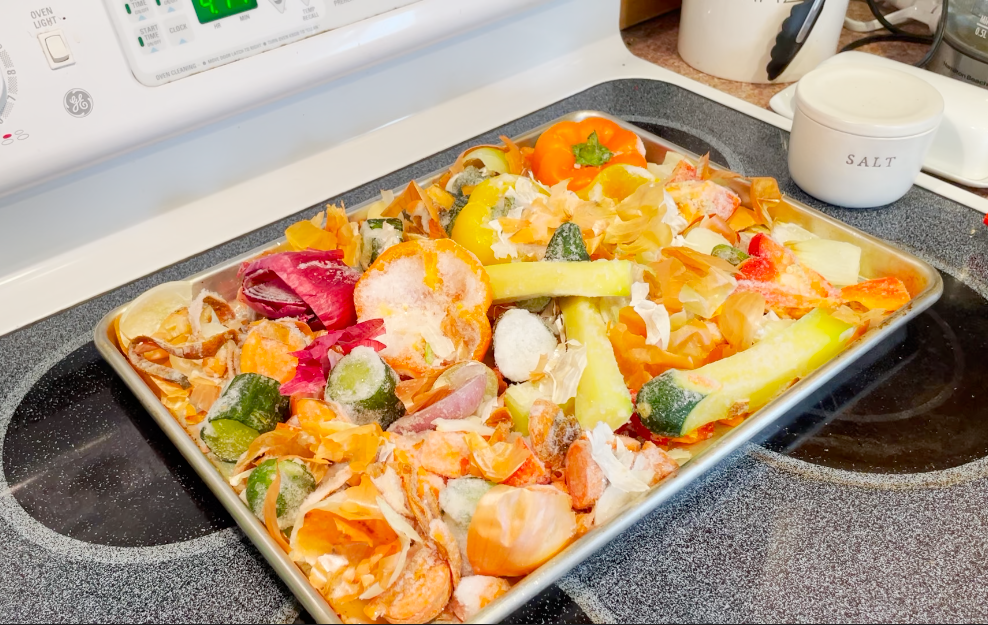
Lay your frozen veggies out on a sheet pan and toss with a small can of tomato paste (optional), add some stems of dried herbs (or just sprinkle with some if you don’t have the full stems), we use thyme and a bay leaf (one per sheet pan), drizzle with a good olive oil and some wine (optional, but whatever you have open is just fine), season it with a few pinches of salt and roast in the oven at 375 degrees for about 20-30 minutes if your veggies are still frozen (you might want to reduce the time if they are thawed). Roasting your veggies before you put them in water brings out the oils in your vegetables and fresh herbs.
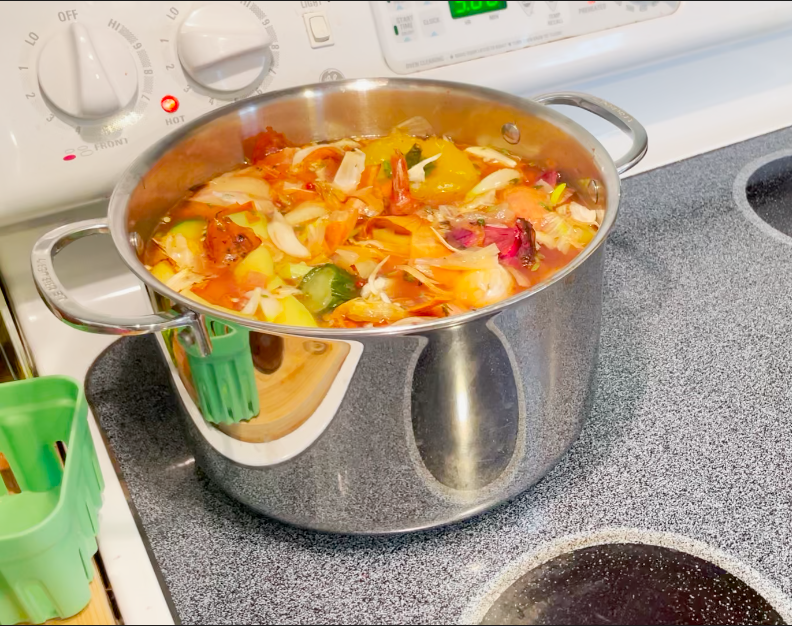
Once they are roasted, dump the veggies into your stock pot, scrape the pan with a spatula, and put all of those leftover goodies in there too. Fill your pot with water until the scraps are covered and just start to float, bring them to a simmer and then turn the heat down. Boiling or simmering too hard will give you a bitter tasting stock. You really just want it to be hot hot water for about 45 minutes to an hour. Most stock recipes will tell you to simmer, but since you’ve roasted the vegetables already, you don’t need to beat them up to get their flavors into the water. While you are waiting for your stock collect a strainer, a large bowl, and the vessels you will store your stock in.
Your kitchen should smell pretty amazing at this point. Once your stock is done, strain it into the large bowl. we usually have to work in batches as our “big bowl” doesn’t hold the same amount of liquid as our stock pot. You can press down on the veggies with a spatula to get as much liquid as you can out of them. Once you are satisfied with the straining take a trip out to your compost pile and dump your spent vegetables in. They’ll be feeding your next set of crops in no time!
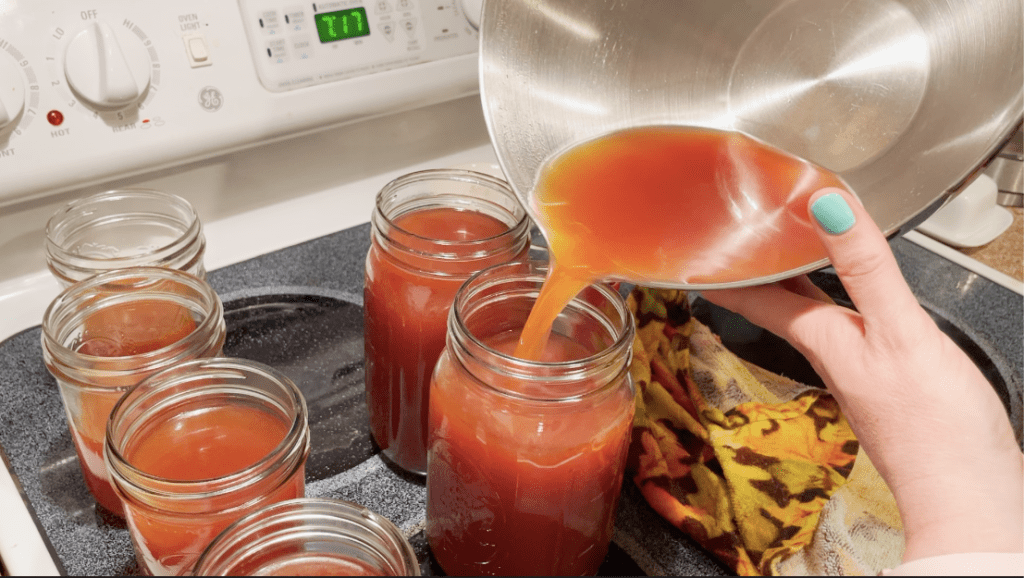
We typically split our batch into one ½ gallon mason jar (for the fridge or for cooking right away) and few wide mouth mason jars. We freeze our stock for storage and wide mouth mason jars are freezer safe. You can either measure out 1 cup increments (to make thawing for recipes easier) or just fill to the liquid line for freezing that is on the jars. If you put your stock in the fridge, make sure to use it within a week.
What to do with your veggie stock
We use the ½ gallon jar to make a batch of Great Northern Beans just replacing the water for stock. You can use your stock on any type of beans that you like. If you want to store more stock in your freezer, just do half and half water and stock per whatever recipe you are using.
Once the beans are done we split that recipe into wide mouth mason jars and freeze them as well. Just pay attention to those liquid lines. We thaw one each “taco night” and its just enough for our little family of four.
We also use veggie stock in place of water to cook rice. It adds so much flavor and nutrients, without much effort, to an otherwise plain food.
TL/DR
Preheat Oven to 375
Put bag of frozen veggie scraps on a sheet pan – sprinkle with fresh or dried herbs, pinch of salt, sprinkle of olive oil, and a sprinkle of wine (optional). Toss all together and spread back out.
Roast frozen veggies at 375 for 20-30 minutes
Added roasted vegetables to stock pot and fill with water until everything starts to float.
Heat to simmer and then reduce to just hot, and leave uncovered on the stove for an hour.
Strain stock and let cool.
Bring your spent vegetables out to the compost pile.
Portion your stock and freeze or refrigerate.

Nothing better!
LikeLiked by 1 person
Exactly! Thank you for reading! ❤
LikeLiked by 1 person